

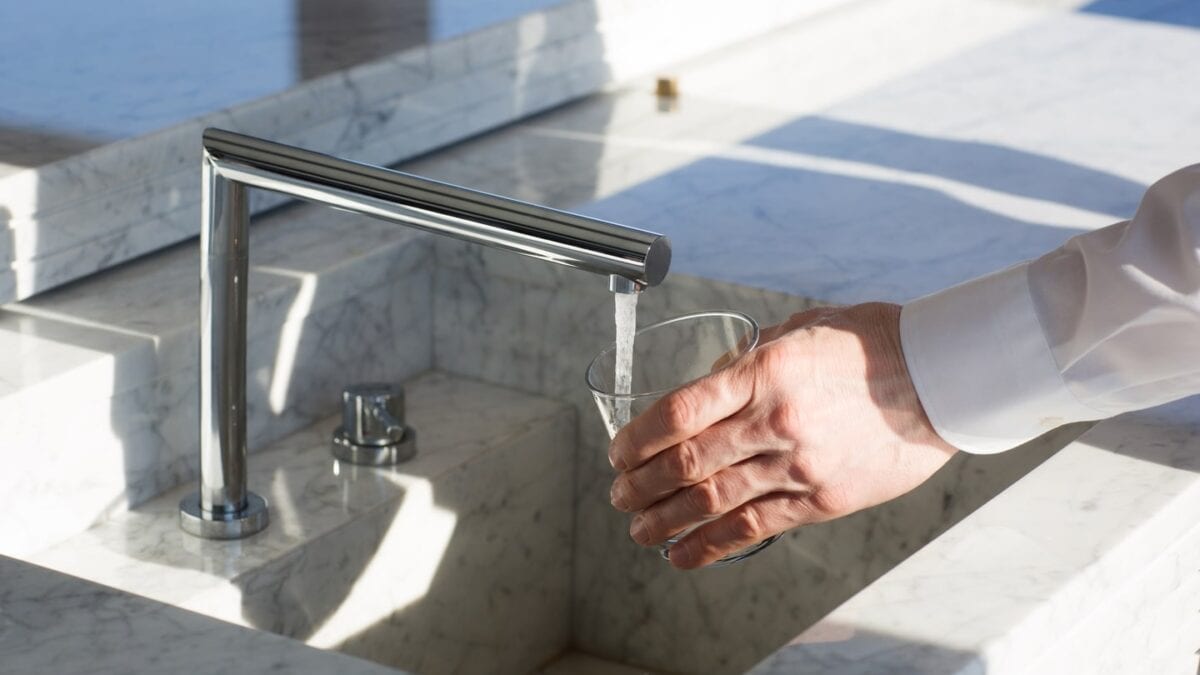
To fix a kitchen faucet that won’t turn on, check the water supply and clean the aerator. If the problem persists, inspect the cartridge for damage.
A malfunctioning kitchen faucet can disrupt your daily routine. It’s essential to address the issue promptly to restore functionality. Start by ensuring the water supply is on and free from blockages. Often, mineral deposits in the aerator can obstruct water flow.
Removing and cleaning it might resolve the issue. If the faucet still doesn’t work, the cartridge may be damaged or clogged. Replacing the cartridge can typically solve the problem. Regular maintenance can prevent such issues, ensuring your faucet operates smoothly. Proper care extends the lifespan of your faucet, saving you time and money.
Credit: www.babesplumbing.com
Common Issues
Is your kitchen faucet not working? This guide will help you. Understanding common problems helps you fix them quickly.
Water Supply Problems
First, check the water supply. Make sure the valves are open. Sometimes, the valves under the sink get turned off.
- Check both hot and cold water valves.
- Ensure they are fully open.
- If they are open and still no water, inspect the pipes.
Look for any leaks or kinks in the pipes. A damaged pipe can block water flow.
Another common issue is the water heater. If the hot water is not working, the water heater might be the problem.
Clogged Aerator
The aerator is the small screen on the faucet tip. It can get clogged with debris.
- Unscrew the aerator from the faucet.
- Rinse it under water to remove debris.
- Soak it in vinegar for a deeper clean.
- Reattach the aerator to the faucet.
Check if water flows smoothly. A clean aerator can solve many problems.
If these tips don’t help, the issue might be more complex. You may need professional help.

Credit: www.linkedin.com
Tools Needed
Fixing a kitchen faucet that won’t turn on requires the right tools. Using the correct tools ensures a smooth and efficient repair process. Below, we outline the basic and specialized tools needed for this task.
Basic Tools
- Adjustable Wrench: Essential for tightening or loosening nuts and bolts.
- Screwdriver Set: Useful for removing screws of various sizes.
- Plumber’s Tape: Helps to seal pipe threads to prevent leaks.
- Bucket: Catches any water that may spill during the repair.
- Rags or Towels: Keeps the area clean and dry.
Specialized Tools
| Tool | Purpose |
|---|---|
| Basin Wrench | Reaches tight spaces under the sink. |
| Hex Key Set | Removes or tightens hex screws in the faucet. |
| Faucet Puller | Removes stubborn faucet handles without damage. |
| Plumber’s Grease | Lubricates faucet parts for smooth operation. |
Having these tools on hand makes fixing your kitchen faucet easier. Make sure you have all the necessary tools before starting your repair job.
Turn Off Water Supply
When your kitchen faucet won’t turn on, the first step is to turn off the water supply. This ensures no water leakage and allows you to work safely.
Locate Valves
Finding the water supply valves is essential. These valves are usually under the sink. Look for two handles or knobs connected to pipes.
Shut Off Procedure
Turning off the valves is simple. Follow these steps:
- Turn both handles clockwise until they stop.
- Test the faucet to ensure no water flows.
- If water still flows, check for secondary valves or shut off the main water supply.
Shutting off the water supply is crucial for safe faucet repair. It prevents unwanted water damage and makes the process easier.
Check Water Supply Lines
Having trouble with a kitchen faucet that won’t turn on? Checking the water supply lines is a crucial step. This section will guide you through inspecting connections and looking for leaks.
Inspect Connections
First, ensure the water supply valves are fully open. These valves are usually located under the sink. Turn them counterclockwise to open. If they are already open, you might need to inspect the connections further.
Check the supply lines connecting the valves to the faucet. Make sure they are secure and not twisted. A loose connection can block water flow.
Use a wrench to tighten any loose connections. Be careful not to over-tighten, as this can damage the fittings.
Look For Leaks
Next, look for any leaks along the water supply lines. Even a small leak can cause the faucet to malfunction.
Place a dry cloth under the supply lines and turn on the valves. If the cloth gets wet, you have a leak.
Examine the connections for any signs of water droplets. If you find a leak, you may need to replace the washer or the entire supply line.
Here’s a quick checklist:
- Ensure valves are open
- Check supply line connections
- Tighten loose fittings
- Look for leaks with a dry cloth
By following these steps, you can fix many common faucet issues. Always ensure connections are secure and leak-free.
Clean The Aerator
A common issue with kitchen faucets is the water not turning on. Often, the problem lies in the aerator. The aerator is a small screen attached to the faucet’s tip. It can get clogged with minerals and debris. Cleaning the aerator can usually fix this issue.
Remove Aerator
To start, you need to remove the aerator from the faucet. This process is simple and requires basic tools.
- First, grab a pair of pliers or an adjustable wrench.
- Wrap the jaws of the tool with a cloth to avoid scratching the faucet.
- Turn the aerator counterclockwise to loosen it.
- If it’s tight, apply a bit more force but be gentle.
Once the aerator is loose, remove it from the faucet. Be careful not to drop any small parts.
Clean Components
After removing the aerator, you need to clean its components.
- Disassemble the aerator carefully. It usually has multiple small parts.
- Use a toothbrush or small brush to scrub each part.
- Rinse the parts under warm water to remove debris.
- Soak the parts in a vinegar solution for 30 minutes. This helps dissolve mineral buildup.
Reassemble the aerator after cleaning. Reattach it to the faucet. Turn the water on to check if the issue is resolved.
Cleaning the aerator can often fix a faucet that won’t turn on. This simple task can save you time and money.
Inspect Cartridge
Having trouble with a kitchen faucet that won’t turn on? You may need to inspect the cartridge. The cartridge controls the flow of water. If it’s damaged or dirty, it can cause issues.
Remove Cartridge
First, turn off the water supply. This is usually located under the sink. Then, using a screwdriver, remove the handle of the faucet. You will see the cartridge inside. Carefully take it out using pliers.
Check For Damage
Now, check the cartridge for any signs of damage. Look for cracks, breaks, or worn-out seals. A damaged cartridge can prevent water flow. If you find any damage, you will need to replace the cartridge.
Here is a quick checklist for checking the cartridge:
- Look for visible cracks.
- Check seals for wear and tear.
- Ensure all parts are intact.
If the cartridge appears intact, it might be clogged. You can clean it using a brush and some vinegar.
| Cartridge Issue | Solution |
|---|---|
| Cracks or breaks | Replace the cartridge |
| Worn-out seals | Replace the seals |
| Clogs | Clean with vinegar and a brush |
By inspecting and maintaining the cartridge, you can fix many faucet issues. This simple step can save you money and effort.
Replace Faulty Parts
Is your kitchen faucet not turning on? Sometimes, replacing faulty parts can fix the issue. This guide will walk you through the process. Follow these simple steps and get your faucet working again.
Identify Parts
First, you need to identify the parts of your kitchen faucet. This includes the handle, cartridge, and aerator. Here’s a quick breakdown:
- Handle: The part you turn to control water flow.
- Cartridge: Controls the water temperature and flow.
- Aerator: The screen at the faucet’s tip that controls water stream.
Use the faucet’s manual to identify these parts precisely. If you don’t have a manual, you can often find one online with the model number.
Install New Components
After identifying the faulty parts, it’s time to install new components. Follow these steps to make the replacement process easy:
- Turn off the water supply to the faucet.
- Use a wrench to remove the faucet handle.
- Take out the faulty cartridge or aerator.
- Insert the new cartridge or aerator in its place.
- Reattach the handle and tighten it with a wrench.
- Turn the water supply back on and test the faucet.
Ensure all parts are securely installed. Leaks can occur if components are loose.
By following these steps, your kitchen faucet should start working again. If the problem persists, consider consulting a professional plumber.
Reassemble And Test
Once you have fixed the internal issues of your kitchen faucet, it’s time to reassemble and test it. This step ensures everything is put back together correctly and functions as expected. Follow the steps below to ensure a smooth reassembly and proper testing.
Reattach Components
Begin by reattaching all the faucet components you removed earlier. This includes:
- Screws and nuts
- Handles
- Aerator
Make sure each part is securely tightened but avoid over-tightening. Over-tightening can damage the components.
Turn On Water Supply
Once all parts are reattached, turn on the water supply. Follow these steps:
- Open the under-sink valves slowly.
- Check for any leaks around the faucet.
- If no leaks, turn the faucet on.
Ensure both hot and cold water flow properly. If there are any issues, turn off the water and check the connections again.
By following these steps, your kitchen faucet should function as good as new!
Preventive Maintenance
Preventive maintenance is key to keeping your kitchen faucet functioning smoothly. Regular upkeep can help avoid issues like a faucet that won’t turn on. By following simple steps, you can ensure your faucet stays in top condition.
Regular Cleaning
Regular cleaning is essential for a well-working kitchen faucet. Dirt and debris can block the water flow. Clean the faucet head with a cloth to remove buildup.
Use a mild cleaner and warm water. Scrub the faucet gently to avoid damage. Ensure you clean all parts, including the spout and handle.
For tough grime, soak the faucet parts in vinegar. This helps dissolve mineral deposits. Rinse thoroughly after soaking to remove any residue.
Check For Wear
Inspect your faucet regularly for signs of wear. Look for leaks, rust, or cracks. These issues can lead to bigger problems if ignored.
Check the faucet’s O-rings and gaskets. These small parts can wear out over time. Replace them if they show signs of wear.
Ensure the faucet handle moves smoothly. Tighten any loose screws to prevent further damage. A well-maintained faucet will last longer and work better.
Here’s a simple checklist for your faucet maintenance:
- Clean the faucet head weekly
- Inspect for leaks or rust monthly
- Check O-rings and gaskets every six months
- Tighten loose screws as needed
By following these steps, you can keep your kitchen faucet in excellent condition. Regular maintenance helps avoid costly repairs and ensures a steady water flow.

Credit: m.youtube.com
Frequently Asked Questions
Why Is My Kitchen Faucet Not Turning On?
Your kitchen faucet may not turn on due to a clogged aerator, a faulty cartridge, or a malfunctioning valve.
How Do I Fix A Clogged Faucet Aerator?
Remove the aerator, soak it in vinegar, and scrub it clean to fix clogs.
Can A Faulty Cartridge Stop My Faucet?
Yes, a faulty cartridge can block water flow. Replacing it can fix the issue.
What Tools Do I Need To Fix My Faucet?
You’ll need a wrench, pliers, screwdriver, and possibly replacement parts like cartridges or washers.
Conclusion
Fixing a kitchen faucet that won’t turn on can be simple with the right steps. Follow our guide for a smooth repair. Regular maintenance helps prevent future issues. Remember to check for common problems like blockages or faulty parts. Enjoy a fully functional kitchen faucet again.
Happy fixing!