
Installing a dryer vent through the roof ensures efficient moisture and lint removal. It prevents potential hazards and maintains dryer performance.
A dryer vent through the roof is essential for homes where sidewall venting is impractical. This setup maximizes space, maintains the aesthetic of your home, and ensures that the dryer functions efficiently. Proper installation is crucial to prevent moisture buildup, lint accumulation, and potential fire hazards.
Using high-quality materials and ensuring a clear, straight path for the vent can enhance safety and efficiency. Regular maintenance is also necessary to keep the vent clear of obstructions. By prioritizing proper installation and upkeep, you ensure a safe and efficient drying system for your home.
Credit: dryerjack.com
Choosing The Right Vent Material
Choosing the right material for your dryer vent through the roof is crucial. It affects the vent’s efficiency and durability. This section will help you understand the pros and cons of different materials.
Metal Vs. Plastic
Metal vents are often more durable and heat-resistant. They can withstand high temperatures from the dryer. Plastic vents are less expensive but can melt or warp over time.
Metal vents also provide better airflow, reducing the risk of clogs. Plastic vents may restrict airflow, leading to lint buildup. This can be a fire hazard.
| Feature | Metal Vents | Plastic Vents |
|---|---|---|
| Durability | High | Low |
| Heat Resistance | Excellent | Poor |
| Cost | Higher | Lower |
| Airflow | Better | Restricted |
Durability Considerations
Durability is key in selecting the right vent material. Metal vents are more durable and can last longer. They resist damage from weather and wear. Plastic vents may crack or warp over time.
Metal vents are also less likely to need replacement. This saves you time and money in the long run. Plastic vents might need frequent checks and replacements.
In summary, choosing the right vent material is important for safety and efficiency. Metal vents offer better durability and performance. Plastic vents are cheaper but less reliable.
Planning The Installation
Installing a dryer vent through the roof requires careful planning. Proper planning ensures safety and efficiency. Follow these steps to get started.
Assessing Roof Structure
First, check the roof structure. Ensure it can support the vent. Look for any damage or weak spots. Fix any issues before installation.
- Inspect for rot or mold.
- Check for sagging areas.
- Examine roof shingles.
Use a flashlight to see hidden areas. A strong roof ensures a safe installation.
Measuring And Marking
Next, measure and mark the location. Use a tape measure for accuracy. Mark the spot where the vent will go. This ensures a straight installation.
Follow these steps:
- Measure the distance from the dryer to the roof.
- Determine the shortest path.
- Mark the center point on the roof.
Double-check your measurements. Accurate marks prevent mistakes during installation.
Safety Precautions
Installing a dryer vent through the roof requires specific safety measures. These precautions ensure the system works effectively and safely.
Proper Ventilation
Ensure the vent path is as straight as possible. This reduces air resistance. Avoid using many elbows in the duct. Each bend slows down the airflow.
Use a duct made of rigid metal. Flexible ducts can sag and trap lint. Lint buildup can block the vent, causing the dryer to work harder.
Check the vent cap on the roof. It should have a backdraft damper. This prevents outside air and debris from entering.
Fire Hazard Prevention
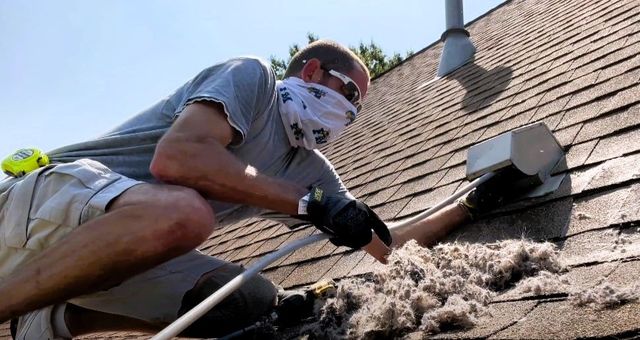
Clean the dryer vent regularly. Lint is highly flammable. Too much lint can cause a fire.
Check the vent for obstructions often. Birds or rodents may build nests in the vent. This can block the airflow, increasing fire risk.
Avoid using plastic or vinyl ducts. They can melt or catch fire. Use only UL-listed metal ducts for safety.
| Task | Frequency |
|---|---|
| Clean lint trap | After each use |
| Inspect vent | Every 6 months |
| Hire professional for deep cleaning | Annually |
- Use a rigid metal duct.
- Keep the vent path straight.
- Clean the vent regularly.
- Inspect the vent cap for damage.
Step-by-step Installation Guide
Installing a dryer vent through the roof might seem daunting. This guide will make it easy. Follow these steps to ensure proper installation.
Cutting The Roof Opening
First, find the best spot for the vent. It should be close to the dryer. Use a measuring tape to mark the spot on the roof.
Next, use a drill to make a pilot hole. This will help guide your saw. Place the saw on the pilot hole and start cutting. Make sure the hole is big enough for the vent pipe.
Wear protective gear while cutting. Safety is always important. After cutting, clean the area. Remove any debris to ensure a smooth installation.
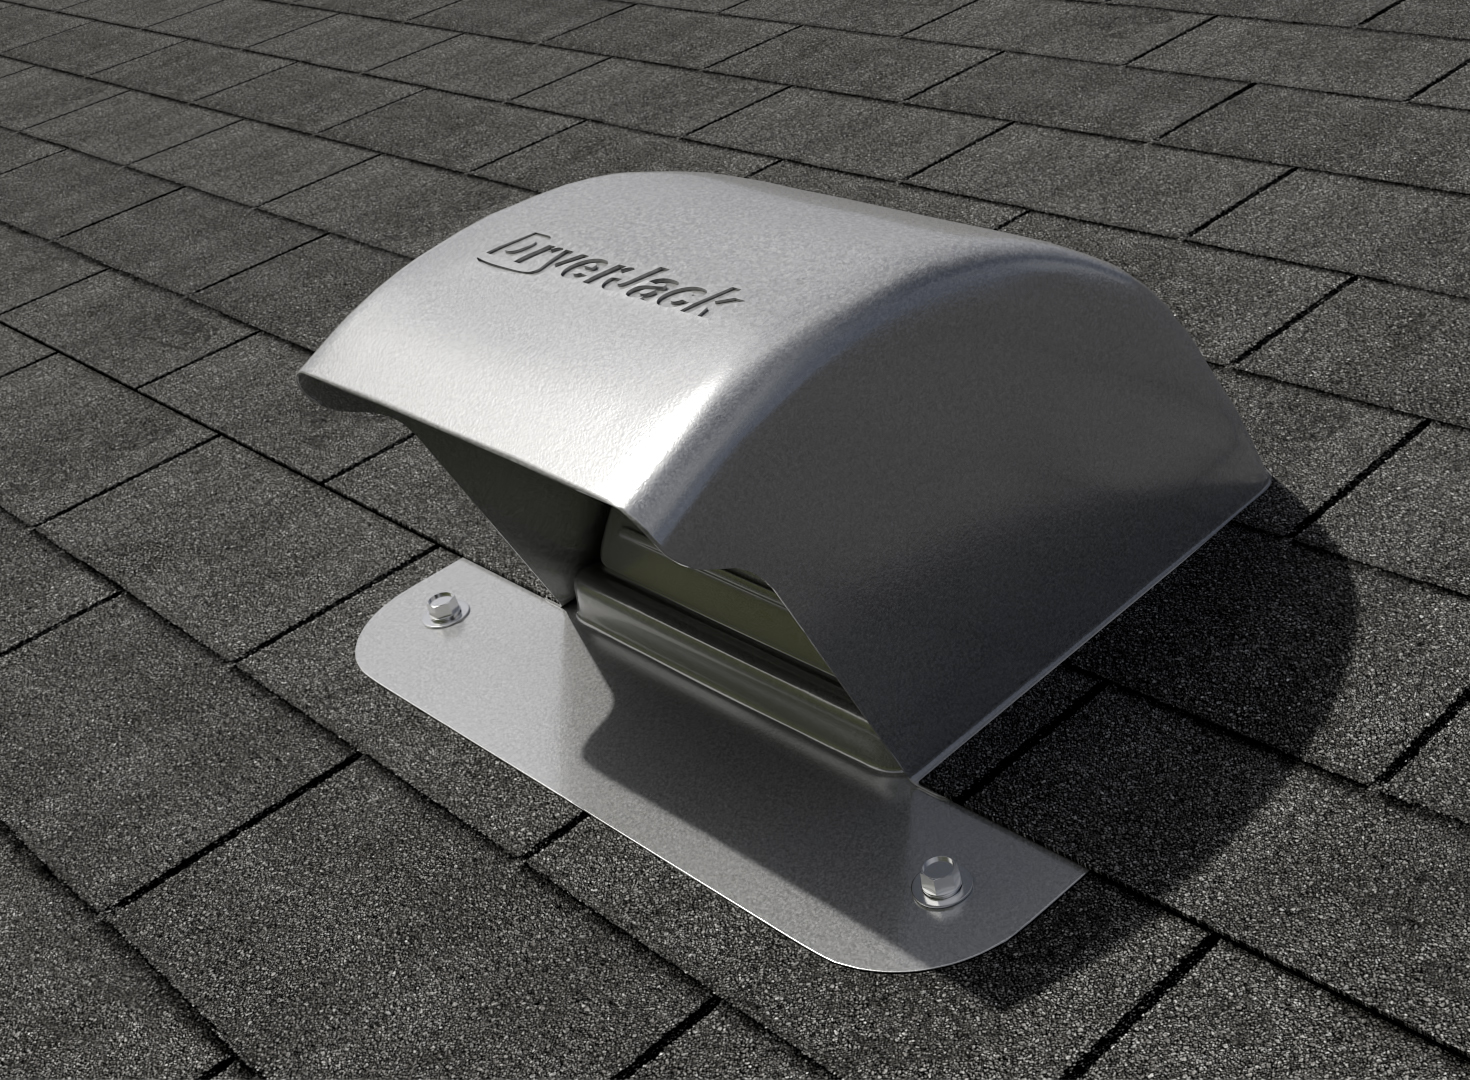
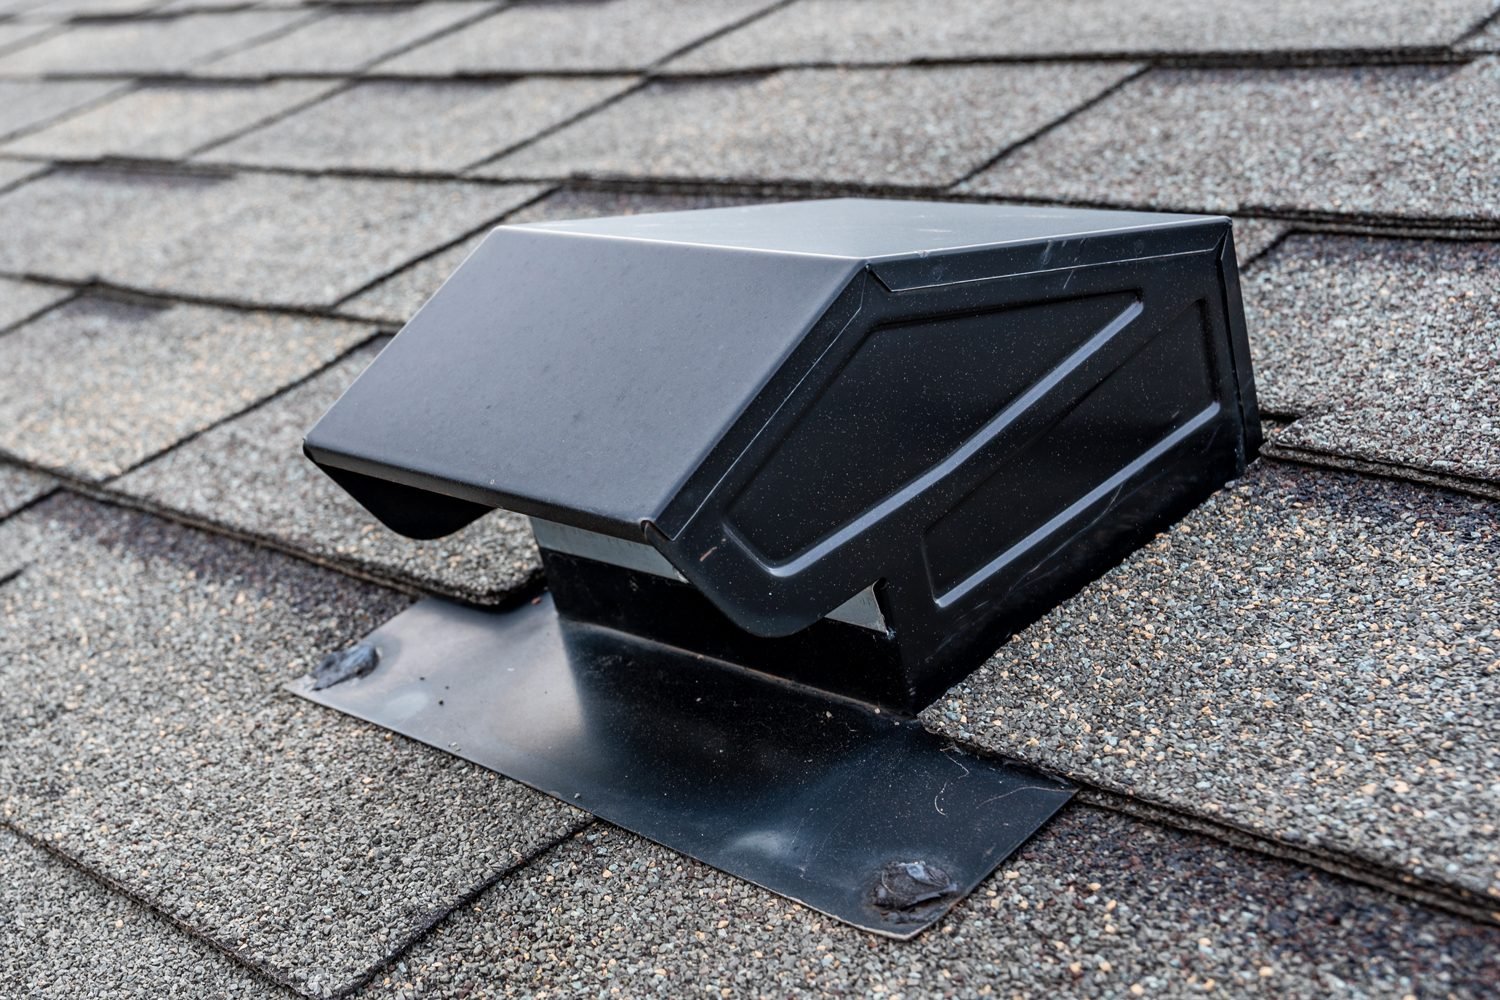
Securing The Vent Cap
Now, it’s time to secure the vent cap. Place the vent cap over the hole. Align it properly to ensure a snug fit.
Use roofing nails to secure the vent cap. Make sure it is tight and secure. This will prevent leaks.
Apply roofing sealant around the edges of the vent cap. This will provide extra protection from rain. Check the vent cap from inside the attic. Ensure there are no gaps or leaks.
Finally, attach the vent pipe to the dryer. Use clamps to secure it in place. Make sure the connection is tight.
By following these steps, your dryer vent will be installed properly. Your home will be safe and your dryer will work efficiently.
Sealing And Insulating
Proper sealing and insulating your dryer vent through the roof is essential. This process helps prevent leaks, improves energy efficiency, and ensures safety. By focusing on weatherproofing and preventing heat loss, you can maintain an optimal drying environment.
Weatherproofing Techniques
Weatherproofing your dryer vent is crucial to keep out moisture and debris. Here are some effective techniques:
- Use a high-quality roof vent cap with a backdraft damper.
- Seal gaps with silicone caulk or expanding foam.
- Install a flashing kit around the vent to prevent water penetration.
Choose materials that can withstand extreme weather conditions. This ensures the durability of your vent system.
Preventing Heat Loss
To maximize energy efficiency, preventing heat loss through the dryer vent is essential. Follow these steps:
- Insulate the vent duct with thermal insulation sleeves.
- Seal joints with aluminum foil tape for a tight fit.
- Install a vent cap with a built-in damper to reduce heat escape.
Proper insulation keeps the warm air inside and reduces energy bills. It also protects your home from cold drafts.
By implementing these sealing and insulating practices, you ensure an efficient, safe, and weatherproof dryer vent system through the roof.
Maintenance Tips
Keeping your dryer vent in top shape is crucial for safety and efficiency. Regular maintenance prevents fires and extends the life of your dryer. Below are some essential tips to help you maintain your dryer vent through the roof.
Regular Cleaning
Clean your dryer vent at least twice a year. Use a vent brush to remove lint and debris. Always unplug your dryer before cleaning. Make sure to clean the area around the vent opening. This prevents blockages and keeps the airflow strong.
You can also use a vacuum cleaner for deeper cleaning. Attach a hose to the vacuum to reach inside the vent. Check the vent cap on the roof as well. Remove any lint or debris blocking the cap. Regular cleaning reduces the risk of fire and improves dryer efficiency.
Inspecting For Damage
Inspect your dryer vent for any signs of damage. Look for cracks or holes in the vent pipe. Damaged vents can leak lint and cause a fire hazard. If you see any damage, replace the vent pipe immediately.
Check the vent cap on the roof. Make sure it’s securely attached and not damaged. A loose or broken vent cap can let in pests and debris. Inspect the vent regularly to ensure everything is in good condition.
Use a table to track your inspection schedule:
| Inspection Date | Condition | Actions Taken |
|---|---|---|
| January 15 | Good | None |
| July 15 | Minor Cracks | Replaced Vent Pipe |
Regular inspection helps catch issues early and keeps your dryer vent safe.
Troubleshooting Common Problems
Having a dryer vent through the roof can lead to issues. Identifying and fixing these problems ensures your dryer works efficiently. Let’s explore common problems and their solutions.
Leakage Issues
Leakage is a serious problem with roof dryer vents. Water entering the vent can cause damage. Here’s how to tackle leakage:
- Inspect the vent cap for cracks or damage.
- Check if the sealant around the vent is intact.
- Ensure the flashing is properly installed and not corroded.
- Replace damaged parts immediately.
Pro Tip: Regular inspections prevent long-term damage and costly repairs.
Airflow Blockages
Blocked airflow reduces dryer efficiency. It can also be a fire hazard. Here are steps to resolve airflow blockages:
- Turn off the dryer and unplug it.
- Remove the vent cover on the roof.
- Use a vent cleaning brush to remove lint and debris.
- Inspect the duct for any blockages.
- Reattach the vent cover securely.
Regular cleaning keeps your dryer running smoothly. It also reduces fire risk.
| Problem | Solution |
|---|---|
| Leakage | Inspect and replace damaged parts, reseal if necessary |
| Airflow Blockages | Clean vent and duct regularly |
Regular maintenance is key to preventing these issues. A little effort can save you from big problems.
Credit: dryerjack.com
Credit: www.familyhandyman.com
Frequently Asked Questions
What Is A Dryer Vent Through The Roof?
A dryer vent through the roof is a venting system for your dryer. It releases moist air and lint from your dryer outside your home through the roof.
How Do You Install A Dryer Vent Through The Roof?
To install a dryer vent through the roof, you need to cut a hole in the roof. Then, attach a vent cap and connect the ductwork from your dryer to the vent cap.
Are Roof Dryer Vents Safe?
Yes, roof dryer vents are safe if installed correctly. Ensure regular maintenance to avoid lint buildup, which can be a fire hazard.
How Often Should You Clean Roof Dryer Vents?
You should clean roof dryer vents at least once a year. Regular cleaning prevents lint buildup, which can cause blockages and fire hazards.
Conclusion
Installing a dryer vent through the roof ensures proper ventilation. It reduces fire risks and improves dryer efficiency. Regular maintenance keeps the vent clear of debris. Prioritize safety by hiring a professional for installation. Enhance your home’s safety and efficiency with a well-ventilated dryer system.